Our Methods

The Finest Nets in the West
STEP 1: Ripping lumber into bendable strips. I start by ripping selected pieces of wood into strips. Thinner strips enable me to use as many as 9 layers to form the wood frame, which makes a markedly stronger net than what is typically found on the market.
STEP 2: Making the handle. Selecting from amongst the nicest figured wood I can source from trusted contacts, I carefully choose the handle wood for its outstanding visual characteristics. Highly figured wood such as curly walnut (Shown Below), many types of burl, birds-eye maple, and ribbon mahogany make stunning handles. I usually make the handle from glued up components which ensures strength. This is where the artist in me gets to play! Handles can be long, short, round, square, whatever! I rough out the handle with planes and the band saw, and then smooth out on a belt sander.
.jpg)
.jpg)
.jpg)
STEP 3: Glue Up. Gluing up is probably the most critical (and often most stressful) time of making a landing net. Time is not on my side as I paint on a water-proof glue onto both sides of six or seven 5-6'strips, and onto the sides of the handle. Beginning at the top of the net, I begin bending and clamping until it is completely clamped around its form. It is an exercise in clamp-em-all-ogy! This is where you need clamps, and a lot of them!
.jpg)
STEP 4: Forming the net to final shape. I let the net dry a solid 24 hours. I plane off any excess wood and glue, remove from the jig, and then begin the sanding process. I first sand on the belt sander at 120 grit to get it flat and to remove any excess glue. After rough sanding, I begin the handle shaping process. This may involve, scraping, rasps, files, and sandpaper, but every net is shaped to be ergonomic and aesthetically pleasing. I route a groove for retaining cord to be inset on the outside of the hoop. This keeps it from getting abraded during use. One by one, holes are drilled on a custom boring machine I designed and built for this purpose. Finally, the net is hand sanded using 150 grit, 180 grit, 220 grit, 320 grit, finally to 400 grit for an extremely smooth & luxurious feel.
.jpg)
.jpg)
.jpg)
Sanding under an inspection light using 400 grit sandpaper. This final step makes the net velvet-Smooth.
.jpg)
STEP5: Finishing. I use a proprietary mix of oils that are hand rubbed onto each net over a 9-day period. There are 3 different recipes I make myself and are applied at least 1 day apart. The first 3 coats are a penetrating oil mixtur. The next 3 are designed to build a thin protective film. Finally, carnuba wax is incorporated into the finish for the final 3 coats. Carnuba wax is a very hard wax and can be buffed to produce an amazing, silky smooth finish.
.jpg)
.jpg)
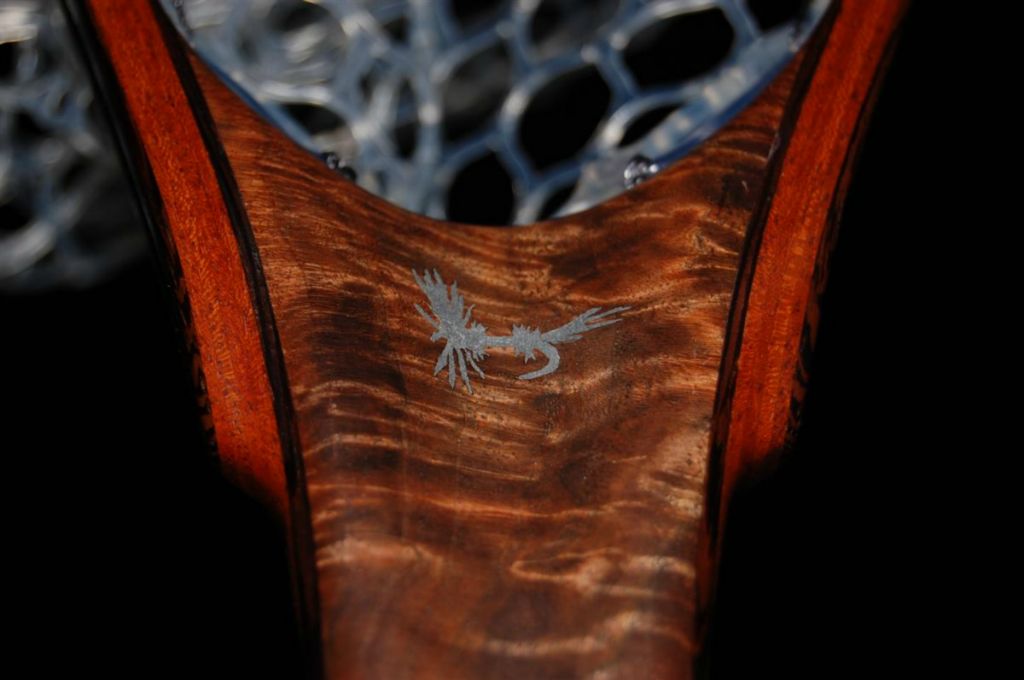
Some clients request custom inlays of Copper, Brass, Aluminum, or Wood.
Here, I prepare a carving of a Royal Wulff fly to be inlaid with aluminum
.jpg)
The inlay after final sanding & 1 coat of oil
STEP 6: Sewing on a net and tying the lanyard. Each net is secured to its hoop using very strong and rot resistant string. After that, I hand tie a lanyard onto the handle and we are done!
.jpg)
.jpg)
The end
